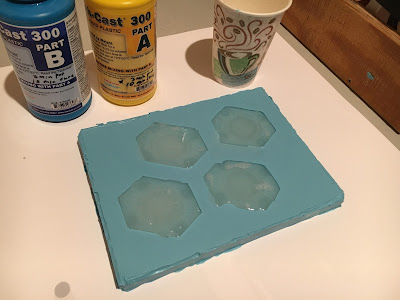
Since there are so many arms of the FX-7, I decided that the most economical way to produce all of the pieces was to 3D print them and then cast them.
I thought I'd start with something small. I made the elbow details in 3D, using reference pictures I found online of the FX-7 when it was on display at the Smithsonian, I believe.
I printed out 4, coated them with XTC-3D to make them smoother, then make a mold using Smooth-On OOMOO 25. Once the mold was made I did a test cast using Smoothcast 300.
I was very happy with the results, but I think I will be more generous with the XTC-3D on the printed pieces in the future since I could still see some of the striping from the 3D print.
Friday, November 18, 2016
Monday, October 17, 2016
Center Body Frame
I cut out and assembled the 15" diameter frame for the center of the body. I am going to wrap this in two layers of 1mm styrene. This will make it very sturdy and provide a base to which I can attach the arm boxes as well as a provide support for the upper body section.
On a side note, I found an online cone template calculator, so once I get some large sheets styrene I can start skinning the frame.
You can find the calculator at http://www.templatemaker.nl/index.php?template=cone&lang=en.
Monday, September 26, 2016
FX-7 at the Milwaukee MakerFaire
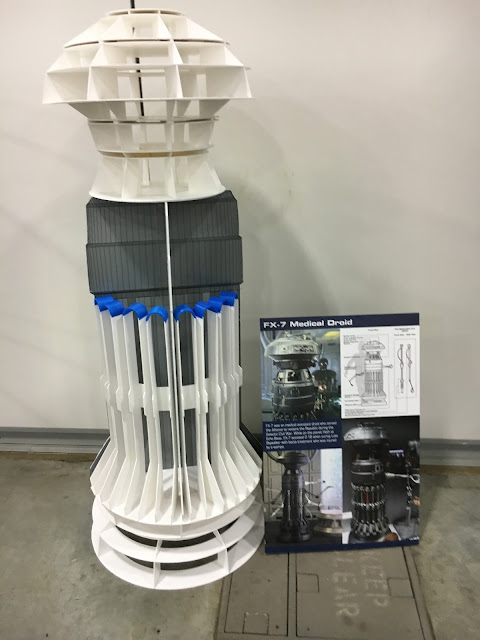
I had the work-in-progress FX-7 frame on display in our R2 Builder's Club booth at the Milwaukee MakerFaire this past weekend! I got a lot of positive feedback and some great suggestions from other builders about the build.
I made a full-size printout of the wireframe 3D model and mounted it of foam board. I then made to leaves that folded out so that I could stand it on the base section. I put a spare circular piece of Sintra on the top as a base where I set the head. This setup, along with half of the arm boxes arranged in around the front, gave you a pretty good idea of how tall and wide it was going to be.
I also made a info poster for the MakerFaire, with a montage of pictures, that explained just who was FX-7.
Now, only 12 more arms boxes to make and then onto the mid section!
Tuesday, September 20, 2016
Base and Arm Box Update
Well, I have made a lot of progress since my last post. The base section is completed and I have roughed out half of the arm boxes. I 3D printed the arched pieces for the top of all of the arm boxes, but I still have to cut out the rest of the sides for the remaining ones.


I think this is as far as I am going to get before the MakerFaire. I may attach a piece of tagboard behind the arm boxes and then attach them to the base piece with double-stick tape when I display it at the faire.


Monday, September 12, 2016
Arm Box Prototype
This is the initial design for the first of 18 arm boxes that are part of the lower body. I designed and 3D-printed a rounded top to the arm box which also has insets for attaching the sides. I am going to lay out and have our plotting cutter score the Sintra for the remaining arm box pieces. The machine is not robust enough to cut all the way through, but it will save me from having to draw all of those detailed pieces by hand.
Friday, September 9, 2016
Neck
Got the neck cut out and glued in place. Gotta keep this build going!
I started cutting out the base pieces and I hope to build the base frame this weekend with the hoped of getting the middle section that houses the arms started next week.
Wednesday, September 7, 2016
Head Frame Complete
I finished the top frame for the head, and with a few support pieces I will soon have the neck done.
My next plan of action is to cut out the base pieces and then the tall arm body pieces. I am very excited about how quickly things are progressing!
My next plan of action is to cut out the base pieces and then the tall arm body pieces. I am very excited about how quickly things are progressing!
Monday, September 5, 2016
More Head Progress
I got a little more time in the workshop and was able to complete another level of the FX-7 head.
I also cut out some circular pieces for the neck and I hope to cut out the riser sections for those on my lunch hour this week.
Fun stuff!
Thursday, September 1, 2016
Here we go!
After much research, delay and procrastination I have begun building my FX-7 Medical Droid replica. I used a simple illustration blueprint that I found online as a starting point, along with several reference photos of the droid from museum exhibits. I used those to build a base 3D model to get the beginning shapes and dimensions.
I then procured some 3mm foamed PVC from my new friends at Grimco.com (free shipping)! and went to work cutting the first circles for the top of the head.
I then procured some 3mm foamed PVC from my new friends at Grimco.com (free shipping)! and went to work cutting the first circles for the top of the head.
Subscribe to:
Comments (Atom)


